Today I’ll show you how to use Zapier and Trello to create a no-code solution and integrate OpenAI’s GPT-3 language model into your writing workflow.
This works for any business that writes the same type of content regularly. Like a blogging business or content for marketing purposes.
Hi, I’m Joost The Content Decoder and I help businesses of any size bring language models and Ai content into their workflows effectively.
Today I’m showing you my no-code solution to bring AI content into our workflow. I run a digital publishing company with a couple of blogs, and AI content helps us speed up the process of writing.
We used to do that in Jasper.ai, with the use of recipes to get an outline a little bit faster. But it was still a lot of manual work.
That’s why I skipped that step and went directly to the source, OpenAI’s API.

Trello is a useful and free platform where you can make cards and assign those as tasks to your team. I use it to manage our writing process. So Trello was the perfect place for us to bring AI a little closer instead of in a separate app like Jasper.
I have a few different templates for different types of articles we write, like a recipe, a Q&A, or an entity. We write a lot about entities to complete our topical coverage.
Steps to creating a no-code integration for your workflow
Step 1: Trello templates
You can save a card as a template so you’ll be able to use them as the basis for new cards you create. Just click on “Make template” and it will be a template.
Place it somewhere on the board. I use a separate column marked “Templates” for this.
Now you can add several templates to your board that you can call up in an instant. I have added prompts for GPT-3 into my cards.
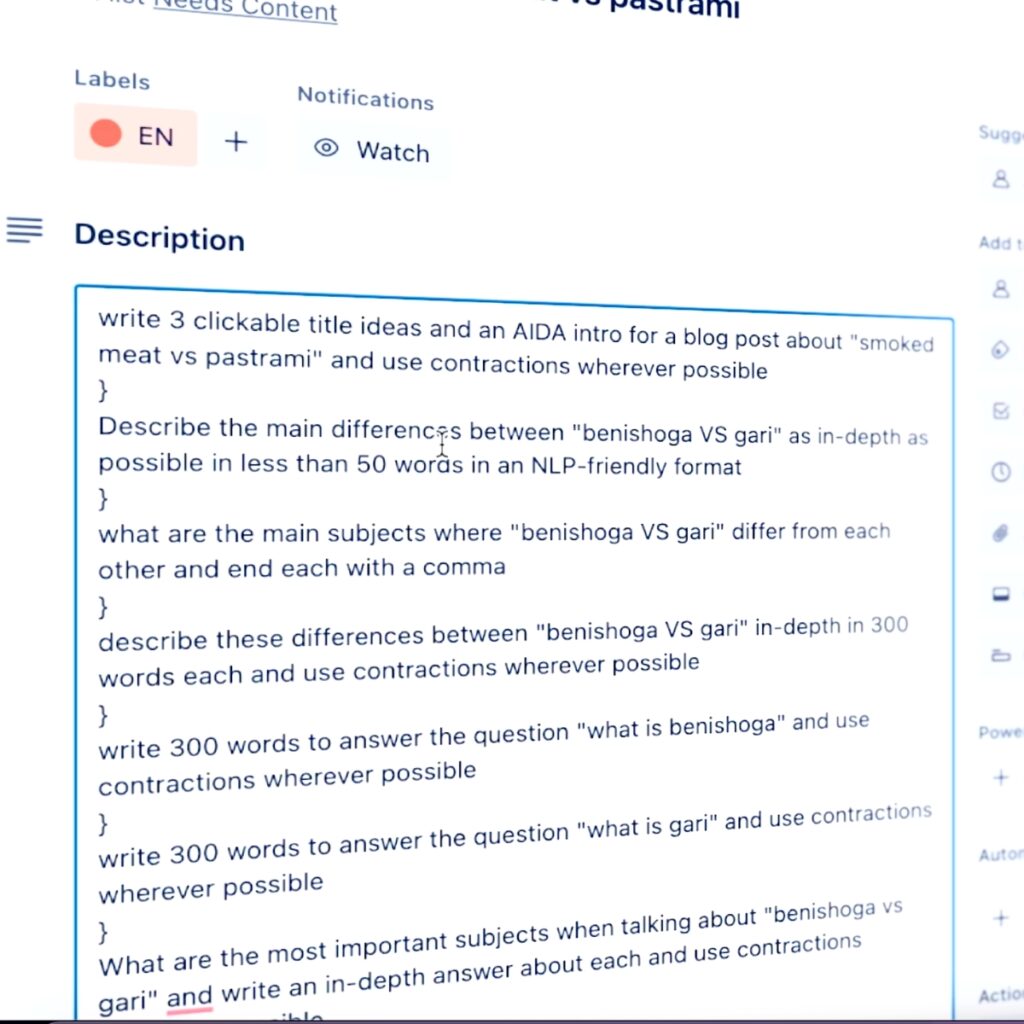
Prompts like:
write 3 clickable title ideas and an AIDA intro for a blog post about “smoked meat vs pastrami” and use contractions wherever possible
I’ve created a few of these prompts that work well for the different types of articles we write.
I just fill out these pre-filled prompts with our topic in a few places. Click out of the card and move it over to the Writing Content column, and the prompts will be automatically used to create the outline and base content for the writer.
The magic behind this is a no-code solution with Zapier.
Step 2: Integrate Trello with Zapier
Zapier is a handy tool that can create connections for you without having to code. It can connect a lot of apps with each other and it has a standard connection with Trello.
I already used it to get info about completed tasks into our spreadsheet for analysis, like the wordcount, type of article for each URL that we write and the amount of words our writers have written for us so we can analyze that along with the amount we paid them.
So when I heard Zapier had developed their OpenAI connector, I jumped on it to streamline our workflow.
Zapier is a paid account so you need to sign up for it, but the pricing is very reasonable and you can start very small and grow if you need.
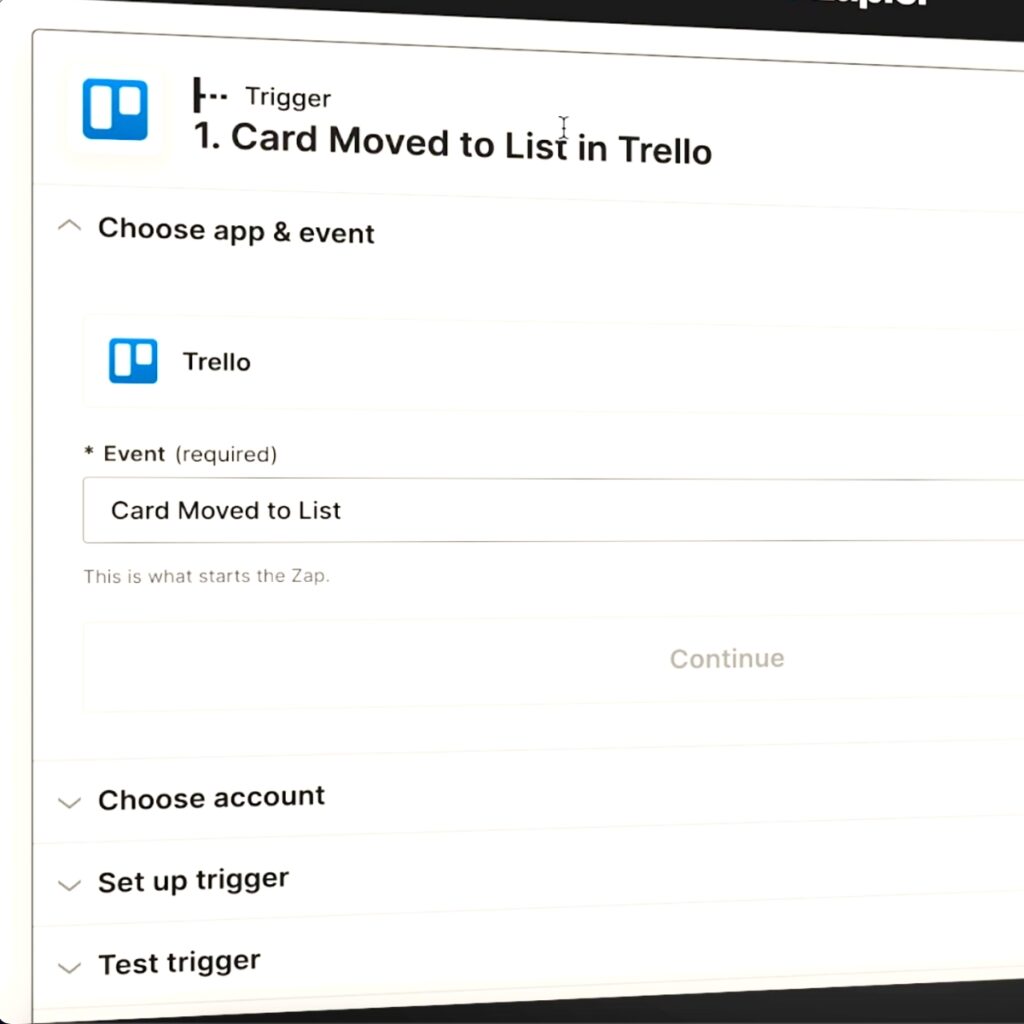
Zapier works with a steps system called “zaps.” You can create a zap and then say what the trigger should be. In our case, the trigger will be Trello, or more specifically: the action of moving a Trello card to a specific column.
That first step in a zap is called the trigger.
I have Zapier set to look for cards that were moved to the Writing Content column. When it finds a card like that, it will continue with the next steps in the zap.
When you choose Trello from the list of possible apps it will prompt you to log in to Trello and grant Zapier access.
This allows you to test the step and retrieve a sample from your Trello board. Make sure you’ve dragged a card with your prompts onto the desired column and select it from the list of cards you see in Zapier.
Click on the test button and Zapier will load your card into its memory for the next steps.
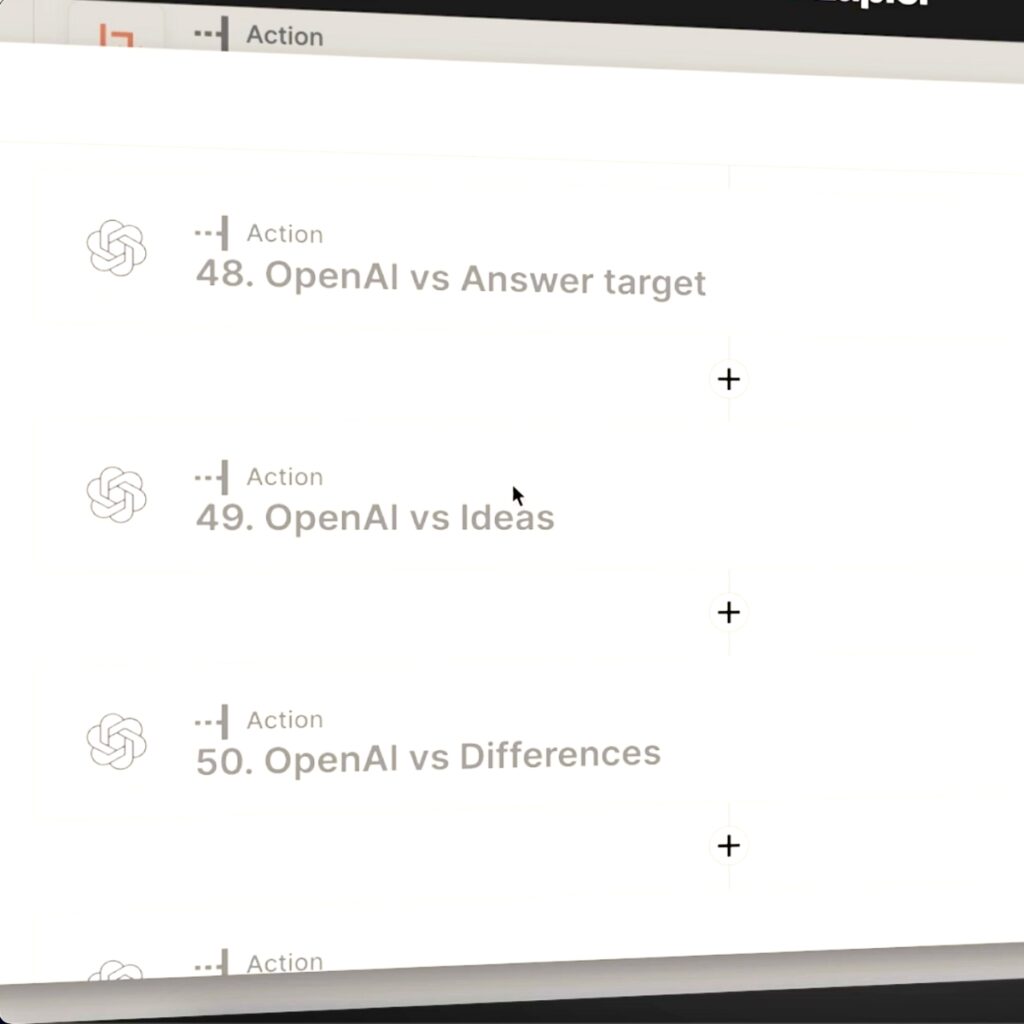
My complete zap takes the prompts written inside it and feeds these to the OpenAI API one at a time.
Step 3: Format the card’s text
If you look closely at the image from my Trello board a few paragraphs back, you’ll notice I used curly brackets between each prompt.
That is to have something to cut the text in the card into smaller pieces. Each of those pieces has its own prompt inside, so when I cut them up they can each go to OpenAI’s GPT-3 model to get a return value (fancy way of saying “we get the AI written text back”).
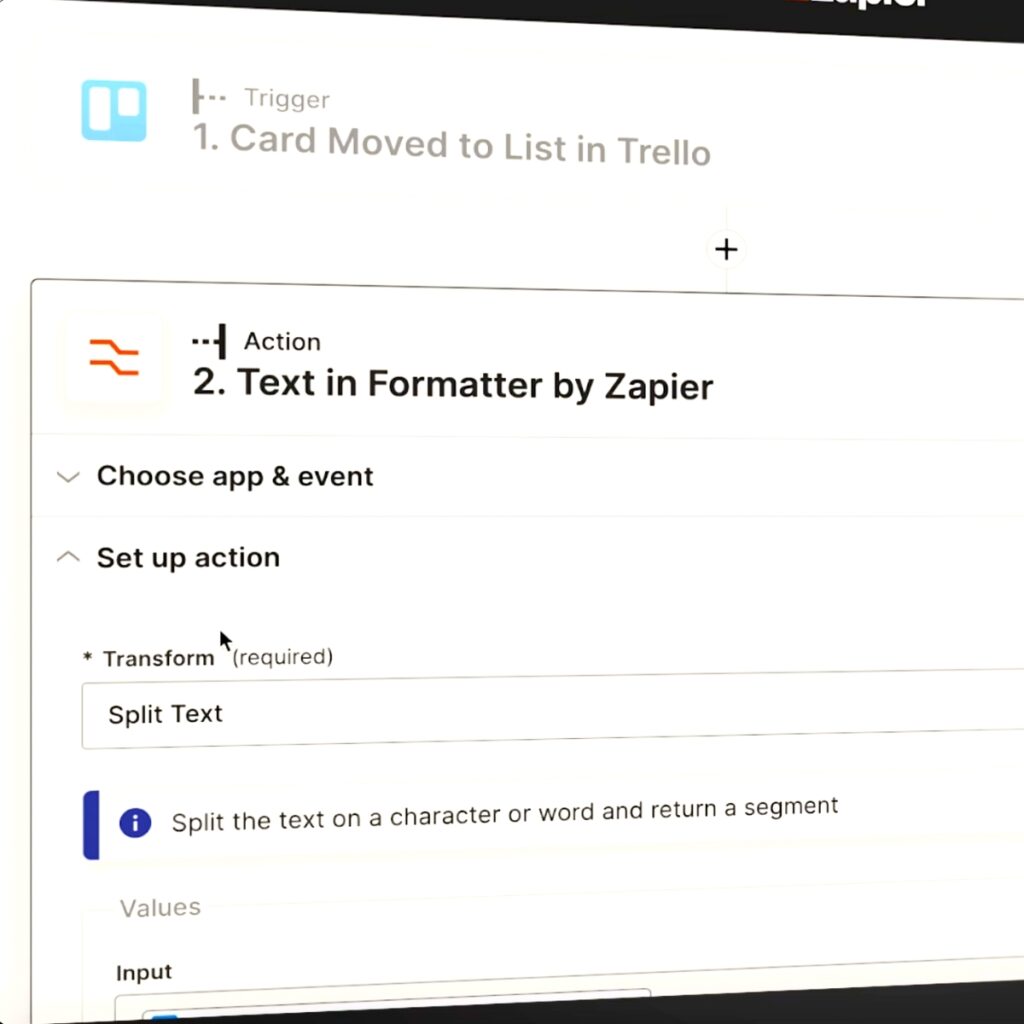
I use the Text Formatter by Zapier app to split the text by “}” and get a list of separate inputs.
- Choose Text Formatter by Zapier
- Event = Text
- Transform = Split Text
- Input = Select the Trello Card Description from the list of Trello Card fields
- Separator = }
- Segment Index = All (as separate fields)
Click on “Test Action” and it will perform the splitting and give you the separate fields back so you can use those in the next steps.
Step 4: Send the prompts to OpenAI
Now that you have the prompts as separate fields, you can send each of them to OpenAI and get the result back.
Integrating is very easy, when you select the OpenAI app you will be asked to provide the API key. You’ll need to sign up to OpenAI to get your key. When you sign up you’ll get $18 in credits (at least at the time of writing this) so that will be enough to test this out.
Enter the following information in the OpenAI step:
- Event = Send prompt
- Model = text-davinci-003 or whichever model is most recent
- Prompt = Select the Output item 1 from the Text Formatter by Zapier
- Temperature = It’s usually set to 0.7 to allow for more creativity, but I like to set it to 0.3 to reduce the chances of the AI inventing facts
- Maximum length = I set this to 2500 tokens but you can set it lower. 1000 tokens is approximately 700 words so that should be enough for each section
Leave the rest as is and then test the action. This should give you the AI content for the first prompt.
Repeat this step for each of the prompts you created on your Trello card.
When they’re finished, the text comes back and Zapier can perform further processing on all of these texts.
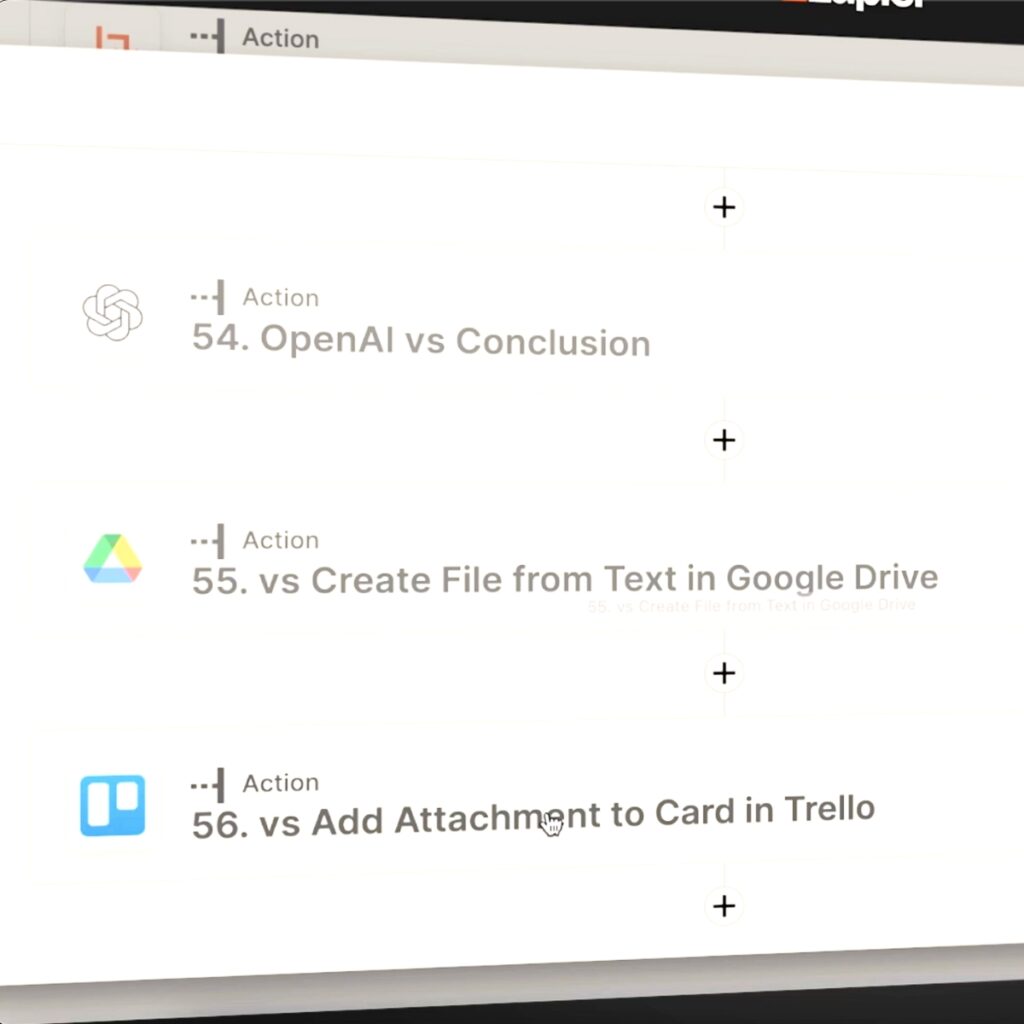
Step 5: Format your Google Doc
Now that you have all of the AI content you can add all of this text into a Google Doc on your Drive. This way you can easily share it with your team and add it to the Trello card.
Select the Create file from text in Google Drive app and use these settings:
- Event = Create file from text
- Choose your account and you’ll need to log in and grant access
- Select the Drive and Folder
- Enter a filename for the file = you can use the title of the Trello card for this
- Then enter the file content:

You can add the different bits of content by selecting them from each of the OpenAI Zapier steps and adding the “Choices Text” fields onto the canvas.
Then add a few sentences in between that could be the headings for each part and you have your outline.
Then Zapier creates a Google Doc with the text inside when you test this step.
Step 6: Add the file to the Trello card
The final step is to add the file to the appropriate Trello card. You can do this by using the Trello app again.
- Event = add attachment to card
- Board = your Trello board
- Card = “Card id” from the first Zapier step
- URL attachments = the “alternate link” from the Create file from text in Google Drive step
When you test this action, the Google Doc should be added to the card.
Now you can publish this zap and it will be implemented for use.
Whenever you drag a card onto your column, the zap will be activated and yuo’ll have your Google Doc on there in about 30 seconds, depending on how many prompts you use.
Wrapping it up
In our workflow, the writer can open it, make their adjustments and move the card over to Content Added when their done so our editor can finish the task, make some final corrections, and put it up on our WordPress site.
This is how we speed up our process significantly with Zapier and OpenAI.
The next step is to integrate this with our Python script to do even more formatting and make sure GPT-3 doesn’t make up stuff so we don’t have to fact check as much, which is the biggest nuisance right now.

Joost Nusselder is The Content Decoder, a content marketer, dad and loves trying out new tools en tactics. He's been working on a portfolio of niche sites since 2010. Now since 2016 he creates in-depth blog articles together with his team to help loyal readers earn from their own succesful sites.